깃허브 repository 초기 셋팅
1️⃣ Issue Template 설정
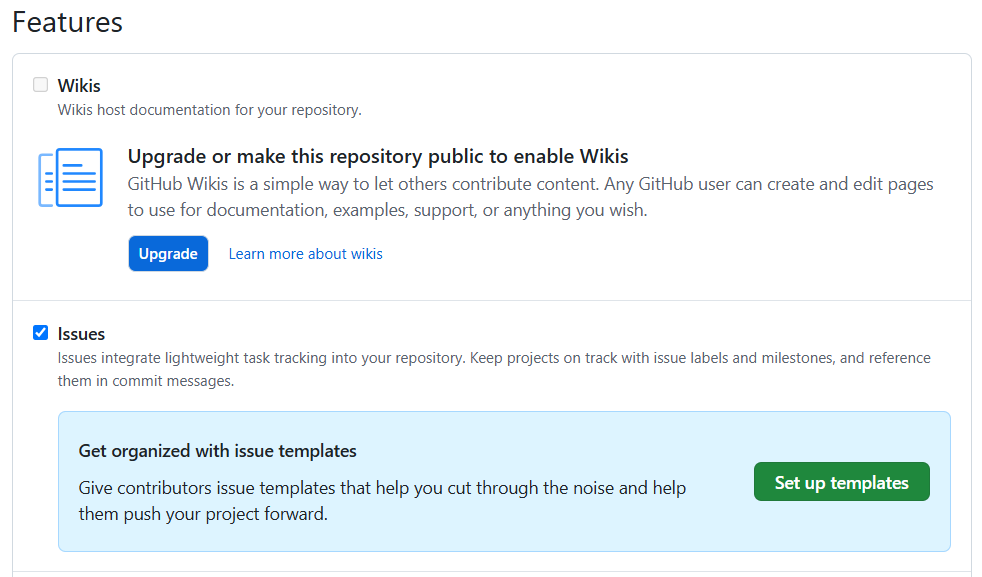
Repository > Settings > Features > Issues > Set up templates
작업할 사항, 할 일을 추가하였다.
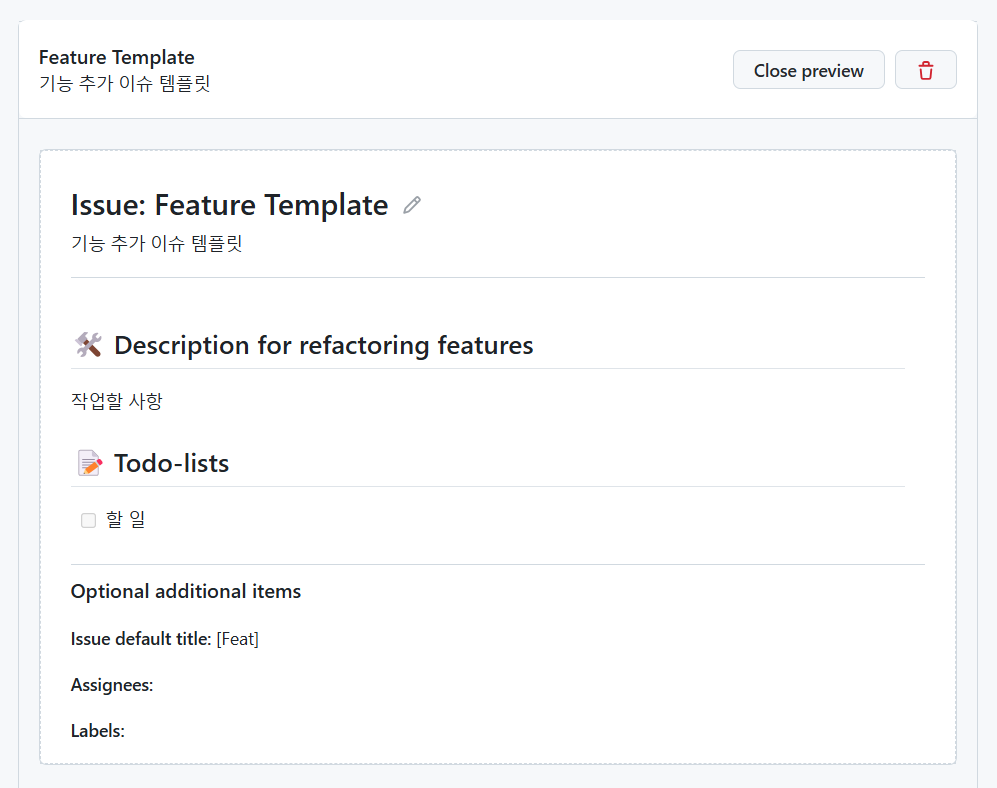
추가를 하면 이렇게 폴더가 생성되고 잘 적용이 된다.

2️⃣ PR Template 설정
생성된 .github 폴더에 pull_request_template.md를 추가하고 아래 내용을 작성하였다.
## 🔥 Issues

이슈 연결

## ✅ What to do

- [ ] 작업한 사항

## 📄 Description

상세 설명

## 🤔 Considerations

고민한 부분

## 👀 References

스크린샷 또는 참고사항
프로젝트 초기 셋팅
1️⃣ react navigation 설치
참고
https://reactnavigation.org/docs/getting-started/
npm install @react-navigation/native
npm install react-native-screens react-native-safe-area-context
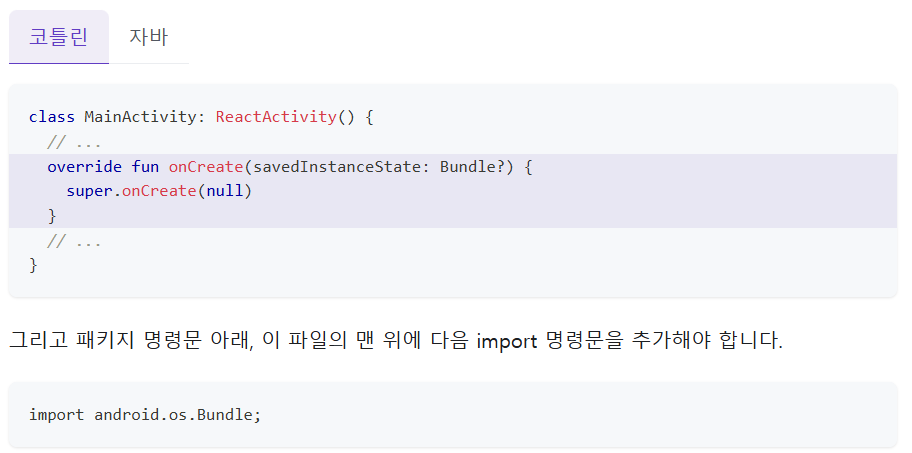
나는 안드로이드로 개발하기 때문에 MainActivity.kt 파일을 찾아 다음과 같이 넣어주어야 한다.
android/app/src/main/java/com/<your package name>/MainActivity.kt
package com.client

import android.os.Bundle; // 추가
import com.facebook.react.ReactActivity
import com.facebook.react.ReactActivityDelegate
import com.facebook.react.defaults.DefaultNewArchitectureEntryPoint.fabricEnabled
import com.facebook.react.defaults.DefaultReactActivityDelegate

class MainActivity : ReactActivity() {

  /**
   * Returns the name of the main component registered from JavaScript. This is used to schedule
   * rendering of the component.
   */
  override fun getMainComponentName(): String = "Client"

  // 추가
  override fun onCreate(savedInstanceState: Bundle?) {
    super.onCreate(null)
  }

  /**
   * Returns the instance of the [ReactActivityDelegate]. We use [DefaultReactActivityDelegate]
   * which allows you to enable New Architecture with a single boolean flags [fabricEnabled]
   */
  override fun createReactActivityDelegate(): ReactActivityDelegate =
      DefaultReactActivityDelegate(this, mainComponentName, fabricEnabled)
}
2️⃣ tailwind 설치
참고
https://www.nativewind.dev/getting-started/react-native
npm install nativewind tailwindcss react-native-reanimated react-native-safe-area-context

// nativewind는 tailwindcss 버전 3.3.2이하에서만 작동 -> 다시 설치함.
npm install --save-dev tailwindcss@3.3.2
npx tailwindcss init을 입력하면 tailwind.config.js가 생성된다.
npx tailwindcss init
tailwind.config.js
/** @type {import('tailwindcss').Config} */
module.exports = {
  content: ['./App.{js,jsx,ts,tsx}', './src/**/*.{js,jsx,ts,tsx}'],
  presets: [require('nativewind/preset')],
  theme: {
    extend: {},
  },
  plugins: [],
};
src폴더를 생성하고 그 안에 input.css를 만들어 아래와 같이 작성한다.
@tailwind base;
@tailwind components;
@tailwind utilities;
bable.config.js
module.exports = {
  presets: ['module:@react-native/babel-preset', 'nativewind/babel'],
};
metro.config.js
const {getDefaultConfig, mergeConfig} = require('@react-native/metro-config');
const {withNativeWind} = require('nativewind/metro');

/**
 * Metro configuration
 * https://reactnative.dev/docs/metro
 *
 * @type {import('metro-config').MetroConfig}
 */
const config = mergeConfig(getDefaultConfig(__dirname), {});

module.exports = withNativeWind(config, {input: './src/input.css'});
App.tsx
/**
* Sample React Native App
* https://github.com/facebook/react-native
*
* @format
*/
import React from 'react';
import {
SafeAreaView,
ScrollView,
StatusBar,
Text,
useColorScheme,
} from 'react-native';
import './src/input.css';
import {Colors} from 'react-native/Libraries/NewAppScreen';
function App(): React.JSX.Element {
const isDarkMode = useColorScheme() === 'dark';
const backgroundStyle = {
backgroundColor: isDarkMode ? Colors.darker : Colors.lighter,
};
return (
<SafeAreaView style={backgroundStyle}>
<StatusBar
barStyle={isDarkMode ? 'light-content' : 'dark-content'}
backgroundColor={backgroundStyle.backgroundColor}
/>
<ScrollView>
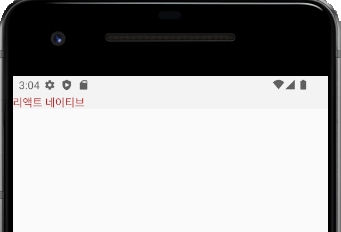
<Text className="text-red-700">리액트 네이티브</Text>
</ScrollView>
</SafeAreaView>
);
}
export default App;
nativewind-env.d.ts 파일 생성 후 아래 입력
/// <reference types="nativewind/types" />
잘 작동한다.
3️⃣ 폴더 구조 생성
폴더 구조
├── .github                         # Feature, PR, Bug template
├── public                          # public
└── src
    ├── api                         # api 호출 Function
    ├── assets                      # fonts, images
    ├── components                  # 페이지를 구성하는 components
    ├── hooks                       # custom hooks
    ├── models                      # interface, type
    ├── pages                       # 페이지를 구성하는 레이아웃
    ├── routes                      # 라우터
    ├── utils                       # date, validator 관련 util 함수
위와 같이 폴더를 만들어주었고 빈 폴더에는 .gitkeep을 만들어 깃에 올라가도록 하였다.
4️⃣ Navigator, index.js 정리
참고
https://reactnavigation.org/docs/hello-react-navigation?config=dynamic
https://velog.io/@eunnbi/React-Native-React-Navigation-Typescript
네비게이션의 종류로는 stack/tab/drawer가 있는데 나는 이 중 stack을 사용할 것이다.
먼저 react-navigation을 설치한다.
npm install @react-navigation/native-stack
npm install react-native-screens react-native-safe-area-context
타입스크립트는 반드시 createNativeStackNavigator의 타입을 지정해줘야 한다.
src > models > navigation.model.ts
export type RootStackParamList = {
  Splash: undefined;
  Entry: undefined;
  BasicInformation: undefined;
  Main: undefined;
  EndChat: undefined;
};
src > navigation > Navigator.tsx
import React from 'react';
import {createNativeStackNavigator} from '@react-navigation/native-stack';
import Splash from '../screens/Splash';
import Main from '../screens/Main';
import Entry from '../screens/Entry';
import BasicInformation from '../screens/BasicInformation';
import EndChat from '../screens/EndChat';
import {RootStackParamList} from '../models/navigation.model';

const Stack = createNativeStackNavigator<RootStackParamList>();

function Navigator() {
  return (
    <Stack.Navigator initialRouteName="Splash">
      <Stack.Screen
        name="Splash"
        component={Splash}
        options={{headerShown: false}}
      />
      <Stack.Screen
        name="Entry"
        component={Entry}
        options={{headerShown: false}}
      />
      <Stack.Screen
        name="BasicInformation"
        component={BasicInformation}
        options={{headerShown: true}}
      />
      <Stack.Screen
        name="Main"
        component={Main}
        options={{headerShown: true}}
      />
      <Stack.Screen
        name="EndChat"
        component={EndChat}
        options={{headerShown: true}}
      />
    </Stack.Navigator>
  );
}

export default Navigator;
App.tsx에 연결
/**
 * Sample React Native App
 * https://github.com/facebook/react-native
 *
 * @format
 */

import React from 'react';
import {NavigationContainer} from '@react-navigation/native';
import Navigator from './src/navigation/Navigator';

function App(): React.JSX.Element {
  return (
    <NavigationContainer>
      <Navigator />
    </NavigationContainer>
  );
}

export default App;
사용 예시
import {NavigationProp, useNavigation} from '@react-navigation/native';
import React from 'react';
import {Text, View, TouchableOpacity} from 'react-native';
import {RootStackParamList} from '../models/navigation.model';

const Splash = () => {
  const navigation = useNavigation<NavigationProp<RootStackParamList>>();
  return (
    <View>
      <Text>Splash</Text>
      <TouchableOpacity onPress={() => navigation.navigate('Entry')}>
        <Text>Go to Entry</Text>
      </TouchableOpacity>
    </View>
  );
};

export default Splash;'졸업 프로젝트 > React-Native' 카테고리의 다른 글
| [React-Native] 카카오 로그인 구현 1)FE 파트 (0) | 2025.03.03 |
|---|---|
| [React-Native] floating 버튼 구현 (0) | 2025.01.22 |
| [React-Native] 초기 셋팅 및 프로젝트 생성 (1) | 2025.01.07 |